The Lion King

1. Start with a head band, the thicker the better as it will be more comfortable for the desired person wearing it.

2. Wrap wool around the band starting from the bottom on the left. Ensure it covers the entire band and repeat this 3-4 times for added comfort. When completed, secure with thread and stitch it as close to the bottom as possible.

3. Next, add the wire and wrap around the centre / top of the band ensuring that the end is facing upwards, not on the inside / underneath because this could injure the user. Secure tightly using thread and stitch underneath the wool to fasten to the band itself.

4. Spread out the pieces of wire so that they are not too close together, so that is resembles a mohawk.

5. Using one long strip of black felt and a black pipe cleaner, wrap the felt around the pipe cleaner as demonstrated in the image above. For more security, use black thread to stitch around the black felt and pipe cleaner. This will prevent any unwinding of the twists. Do not only use a pipe cleaner without the felt because it is not strong enough to support itself / stay upright.

6. Attach the 'ear' to the head band by taking the band from the front and wrapping the end of the felt/ pipe cleaner underneath until the end rests on top of the band. Secure by stitching all the way around, including the top of the band. The more secure it is the longer it will last. Ensure it is secured as tightly as possible.

7.To add to the mohawk effect, wrap thin strips of black felt around each piece of wire individually. This will ensure it is child-friendly and look better to the audience's eye. The ends of the wire can be tricky to secure. Therefore more felt may be required. Stitch around the felt to fasten it to the wire properly without it coming loose.

8. It is important that the felt for the mohawk is fastened tightly to the headband otherwise it will fall apart. Using the stitching technique, black thread will hold it together. Use as much as is required. Pull gently to assess how secure it is. To tidy it up, wrap a strip of black felt equally across the centre.

9. To develop the ears even further, brown felt can be added. Without it the headband looks too plain. Cut out the brown material to fit the size of the inside of the ear. Stitch from the back of the black felt/pipe cleaner through to the front to give a tidier appearance.

Masquerade Mask
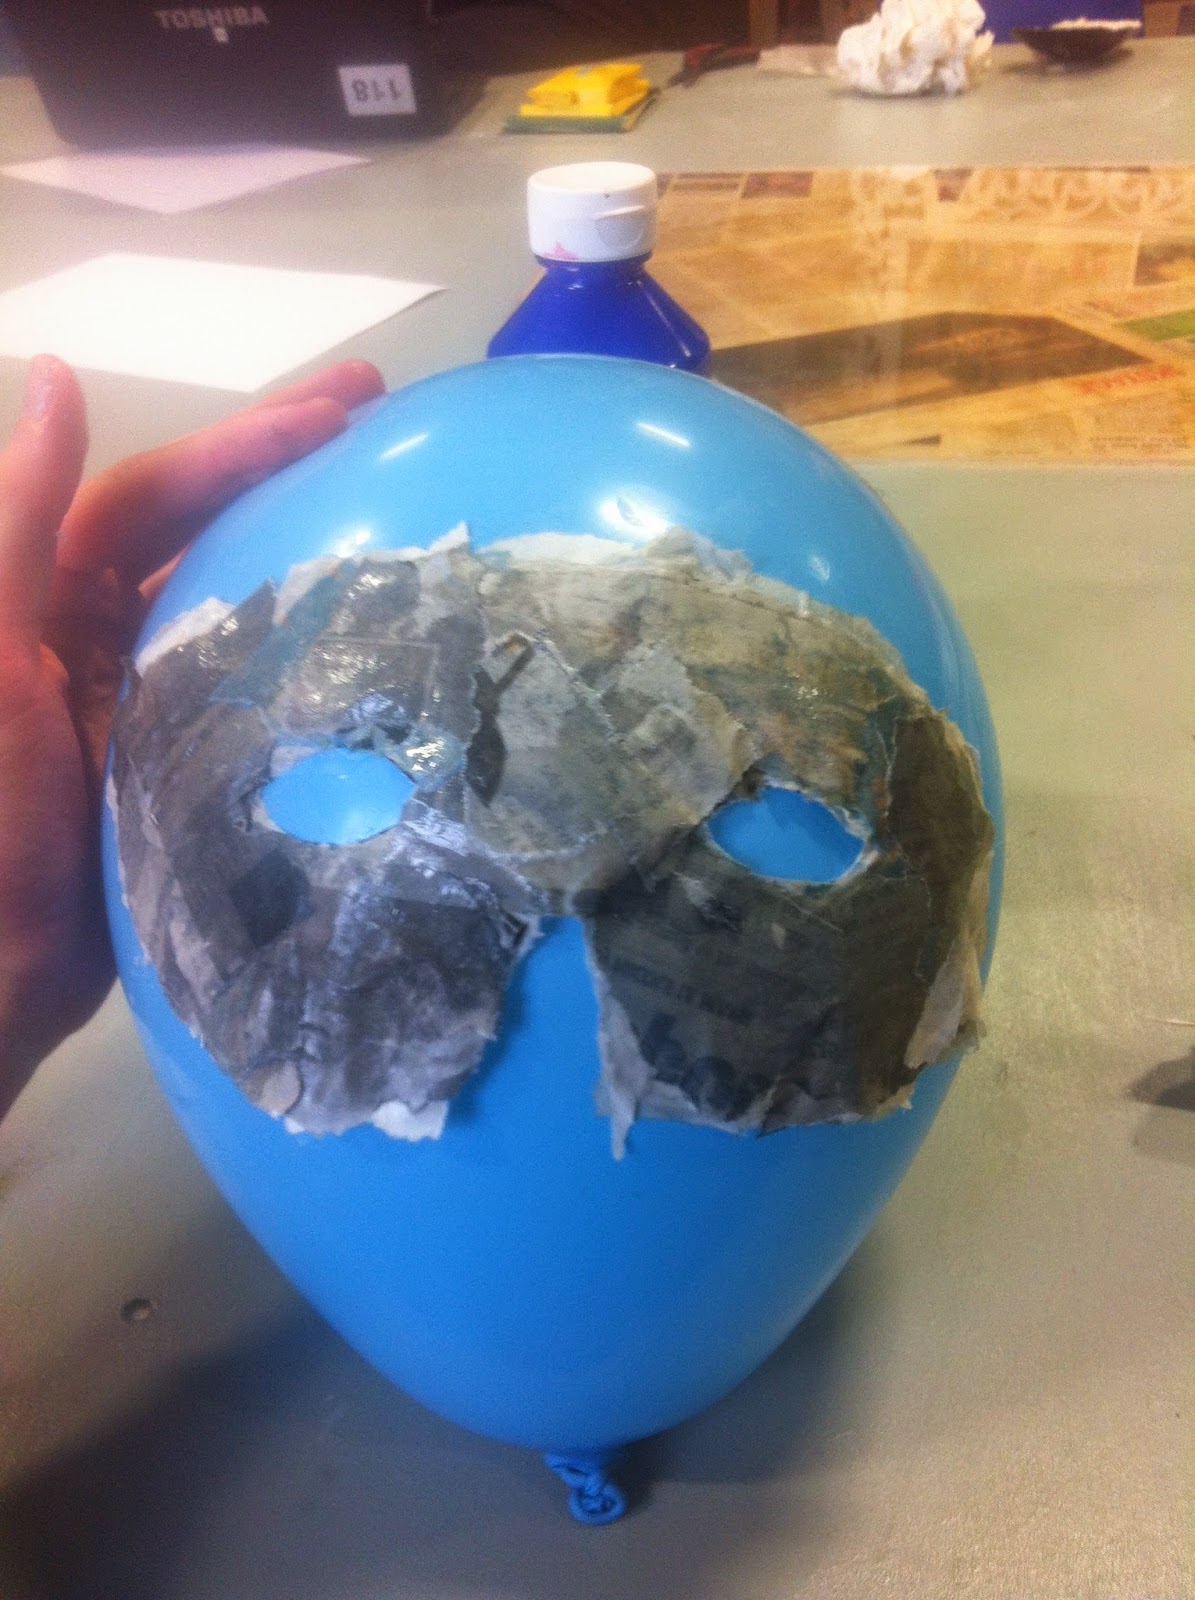
1. Print out a masquerade mask from google, using Microsoft Word to determine the size. Print it out when it is approximately the size of an adult's face / eyes. Cut it out and blow up a balloon.

2. Using water, PVA Glue and pieces of newspaper / thin paper, paper mache the mask on the balloon. Cover the mask with approx 8-9 layers of paper and allow to dry. The more layers the stronger it will be. Be gentle as to prevent the balloon from bursting.

3. When the mask is dry, slowly peel off and detach from the balloon.

4.Begin to plaster in order to strengthen it and ensure it is even to produce a smooth mask. Allow to dry.

4. Decorate the mask using silver spray paint, ensure this is done outdoors because the fumes are dangerous.

5. Once dry, attach the gems using a glue gun in the pattern you wish and using a black sharpie pen / black paint, highlight the outline of the eyes.

6. Attach the material to the back of the mask as demonstrated below. Use a glue gun because it is the strongest method. Then fold the material back over the front of the mask.

7. Once the material is secured, decorate it with Bollywood styled patterns to promote the theme with a gold / silver marker pen.

No comments:
Post a Comment